Order by 3:00 PM Monday – Friday to receive your parcel the next day.
Orders placed after 3:00 PM ship the next working day on the same 24‑Hour service and usually arrive the following day.
See Full Delivery Information.
Overview
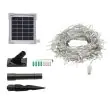
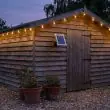
200 warm white LEDs on a 20 m clear wire, powered by a separate solar panel unit with a rechargeable LiFePO4 battery – spike it in the border or fix it to a wall, clip the string along a fence, pergola or rail, and it switches itself on at dusk.
200 warm white LEDs (3000K), about 10 cm apart
20 m of lights plus a 2.5 m lead to the panel
Separate 2W solar panel on a ground spike or wall bracket
A long run of small warm white lights that looks after itself. The 200 LEDs sit about 10 cm apart on a thin clear wire, so a 20 m string dresses a whole fence run, a pergola, a balustrade or a tree without a plug in sight. The solar panel unit is separate: put it where the sun is, on its ground spike or wall bracket, and run the 2.5 m lead to the start of the string.
✓ 200 warm white LEDs✓ 20 m string + 2.5 m lead✓ Separate 2W solar panel✓ LiFePO4 battery✓ Dusk-to-dawn automatic✓ Spike or wall bracket
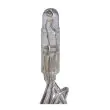
Each light is a slim 33 mm clear capsule with the LED inside, so by day the string almost disappears and by night you see a line of small warm points rather than a row of bulbs. The battery charges during the day, the light comes on when the panel goes dark and runs for around 10 hours after a good day of sun.
Seasonal performance: Best in spring and summer; limited winter operation depends on strong direct sunshine reaching a well-positioned, unshaded solar panel.
Where to Fit It
The string is at its best supported along a line – clip or tie it every three or four lights so it runs straight rather than sagging between fixings.
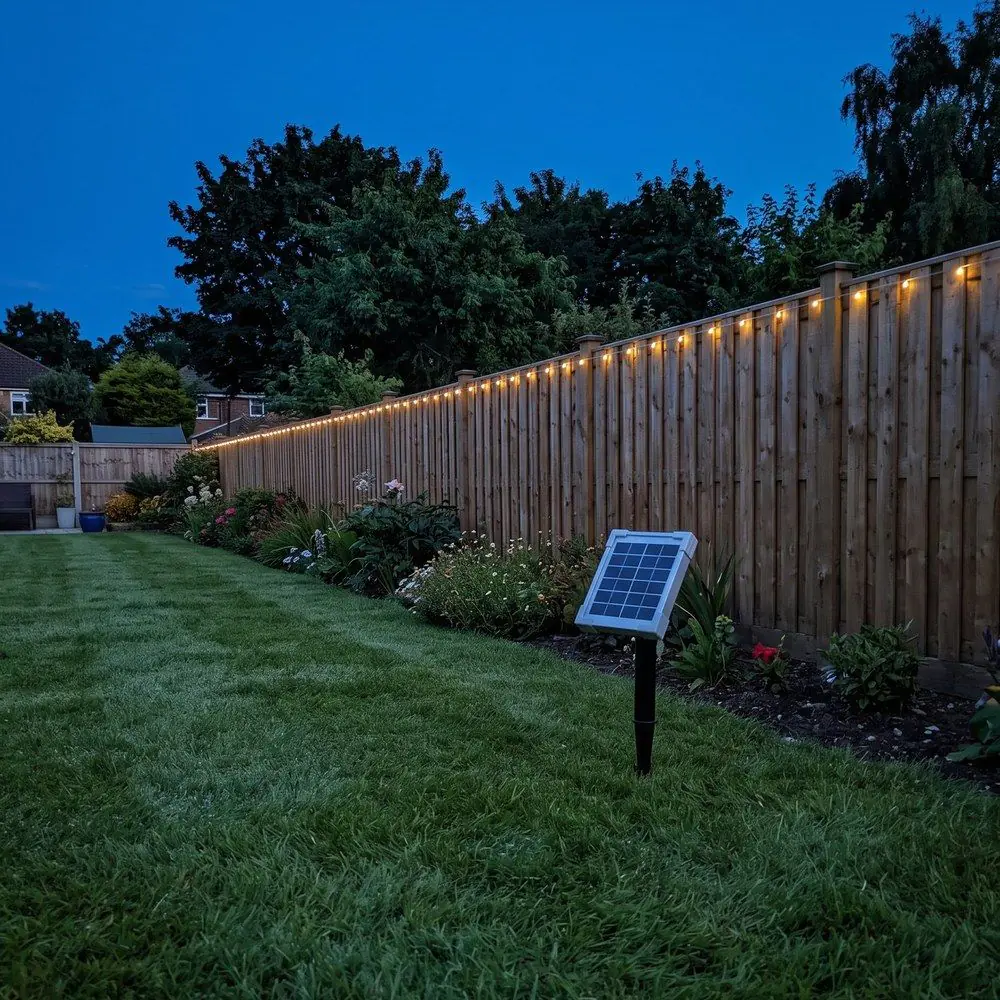
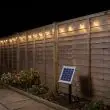
Fences and walls
Along the top rail or coping
A 20 m string covers about ten fence panels
Panel in the border below on its spike
Pergolas, arbours and rails
Along a beam or handrail
Balcony railings – spike the panel in a pot
Decking balustrades and gazebos
Trees and shrubs
Wrap a trunk in an even spiral
The bark supports the wire
Keep the panel out in the open
The Solar Panel Does the Work
The 2W panel and the battery share one small unit with an on/off button on the back. Push the spike into a border or lawn edge, or screw the bracket to a wall or fence post, and angle the panel towards the midday sun with nothing shading it. The unit is the dusk sensor too: the lights only come on once the panel is in darkness, so keep it away from porch lights and street lamps.
Light and Battery
200 warm white LEDs
3000K warm white – a candle-coloured glow
33 mm clear capsules on a clear wire
About 10 cm between lights, 20 m lit length
LiFePO4 battery
3.2V 1500mAh lithium iron phosphate
Around 10 hours a night after a sunny day
Shorter running in dull weather and winter
Good to Know
Solar lights need direct sunlight – aim for five hours or more a day on the panel; less sun means shorter running time, especially in winter. The string plugs into the panel unit with a waterproof two-pin connector; push it fully home and leave it connected. There is one control, the on/off button on the unit – no modes, no remote, no dimmer – which is exactly what most people want from a set that should simply come on every evening.
Rate this product
0/5
0 Reviews
Please rate this product, describe its advantages and disadvantages, please share your impression about its use
Quick, flexible installation – spike the panel unit in a border or screw it to a wall within 2.5 m of where the string starts, angle the panel to the midday sun, press the on/off button to ON, then run the clear-wire string along your fence, rail or beam, clipping it every three or four lights, and push the plug fully home. Keep the panel away from porch and street lights, and give it a full day of sun before judging running time.
String Installation & Care Guide
Your new lighting system uses extremely fine copper wiring to transport low-voltage electricity efficiently. While this technology enables beautiful, eco-friendly illumination, it requires careful handling and specific installation methods to ensure longevity. Understanding these requirements will help you enjoy your lights for many years to come.
1. Panel Mounting Options
Ground spike for soft surfaces
Wall bracket for fences/walls
Shelf stand for windowsills (If Applicable)
2. Optimal Positioning
Choose a south-facing location
Avoid shaded areas during the day
Ensure direct sunlight access for charging
At night, keep the panel/sensor in a genuinely dark spot – avoid nearby windows, security lights or street lamps
3. Light String Support
Support every 2-3 LEDs (avoid spans over 4-5)
What to use: small cable clips or U-hooks (similar to the small clips used for telephone cable) — they hold the wire securely without squeezing or pinching it
Cable ties are fine if left loose — never tightened to the point of compressing the wire
Avoid: wrapping the string around a screw, or splitting the strands and routing them either side of a screw head — both methods damage the fine internal wires and lead to failure over time
4. Power Settings
Switch on for initial setup
Charges in both ON/OFF positions
Auto-activation at dusk using the built-in light sensor
If the panel or sensor is close to other light sources, the lights may not switch on at all
Installation Methods
Choose the best mounting option for your location. Proper installation is crucial for the longevity and performance of your lighting system.
Ground Installation
Soften hard ground with water
Insert spike securely
Attach power unit
Wall Mounting
Use screws and wall plugs
Secure bracket firmly
Click panel into place
Windowsill Setup (where applicable)
Use provided stand
Ensure stable surface
Maximum sun exposure during the day, but avoid strong indoor light on the sensor at night
Safety Checks
Secure all connections
Test stability
Check wire tension
Crucial Considerations for Longevity
Protect your investment by understanding these common challenges and how to avoid them. Proper care from the start ensures years of beautiful illumination.
Why Support Is Crucial
Prevents tension on delicate internal wires
Eliminates weak points that can break
Think of it like securing a delicate necklace
Rule: Support every 2-3 LEDs, with clips that grip without crushing
Water & Weather Protection
Avoid areas with concentrated water flow (e.g., from roofs without gutters)
Waterfalls can wear away protective coating over time
Do not submerge LEDs or place where water pools (unless rated IP65+)
The Conifer Challenge
Requires extra support due to annual pruning and wind movement
Branches can whip around vigorously during storms
Tip: Create a secure pathway, don't just drape
Always remove lights before pruning
Wildlife Interactions
Birds are attracted to small, bright objects resembling berries
Curious beaks can damage LED bulbs
Solution: Avoid strategic placement near bird feeders or heavy bird traffic areas
Moving, Storage & Long-Term Care
The delicate copper wiring requires special care when not in use. Proper handling prevents damage and extends the life of your lights significantly.
Safe Storage & Handling
Never pull, yank, or bunch the strings
Wind carefully around a cardboard tube
Store in a dry, safe location
Avoid sharp bends or kinks in the wire
Reinstallation Checks
Always check wiring for damage before reusing
Reapply all proper supports and cable ties
Test the lights before finalizing your setup
The Investment Pays Off
Proper installation leads to years of trouble-free use
Customers report multi-year longevity with correct care
A few extra minutes during setup saves hours of troubleshooting later
Your Long-Term Care Commitment
Your lighting system is an investment in your outdoor space. While the initial installation may take more time to do properly, this effort pays off many times over in longevity. Remember: The few extra minutes spent on proper support, thoughtful positioning and careful installation will save hours of troubleshooting and replacement later.
Final Note: When properly installed and cared for, your lights can provide years of beautiful, sustainable illumination. The key is understanding that their delicate nature requires thoughtful installation and handling. Take your time with the initial setup, follow these guidelines carefully, and you'll be rewarded with a lasting, magical display.
A separate solar panel unit charges a battery by day and runs 200 warm white LEDs by night. There is one control – the on/off button on the back of the unit – and no modes, remote or dimmer on this set: switch it on once and it looks after itself.
Daytime Charging
The 2W panel charges the built-in 3.2V 1500mAh LiFePO4 battery whenever daylight falls on it
Face the panel south and keep it clear of shade – the panel decides how long the lights run
A full day of sun gives the longest run; dull days give less
Automatic Night Operation
The panel is also the dusk sensor: when it goes dark the string comes on by itself
All 200 LEDs run steady warm white until the battery is spent or dawn returns
Around 10 hours after a full day of sun; shorter in dull weather and winter
Spring and Summer Product
Bright, long evenings from March to September are what this set is built for
In winter the low sun charges little – expect limited or no running on dull days
Keep the panel away from porch or street lights or it will not switch on
The String
200 slim clear capsule LEDs on a clear wire, about 10 cm apart
20 m of lights plus a 2.5 m lead to the panel unit
Waterproof two-pin plug between string and unit – push it fully home