Order by 3:00 PM Monday – Friday to receive your parcel the next day.
Orders placed after 3:00 PM ship the next working day on the same 24‑Hour service and usually arrive the following day.
See Full Delivery Information.
Overview
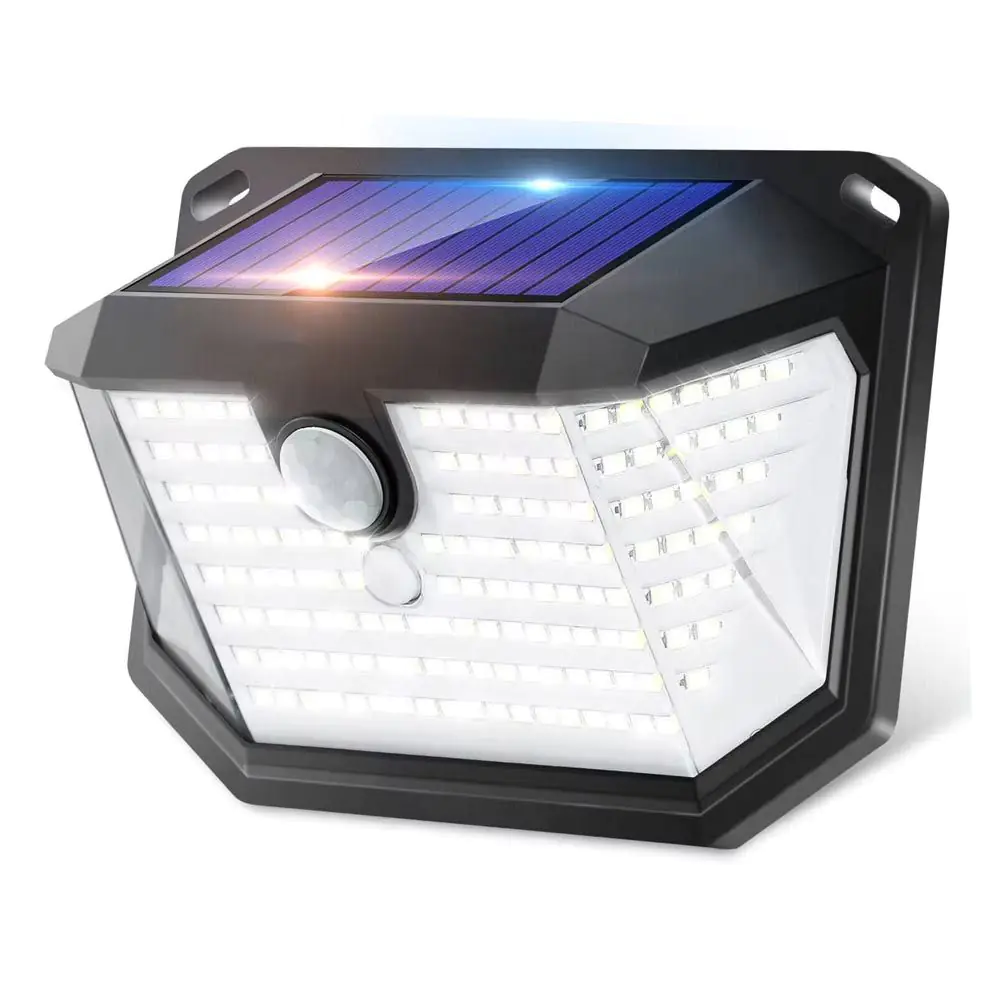
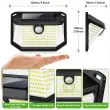
Solar security light that provides up to 500 lm of cool white illumination with a 270° wide beam and PIR activation, designed for simple outdoor setup with no wiring.
Up to 500 Lumen output for practical security lighting
270° wide lighting angle to cover more area per fitting
PIR sensing angle 120°
Motion range 10–16ft
3 lighting modes: Motion Only, Dim (Low), Dim (High)
Automatic dusk ON and OFF operation
178 × 2835 SMD chip LEDs (high efficiency)
IP65 weatherproof rating for year-round outdoor use
1 × 2000mAh replaceable rechargeable battery, solar powered
Mount the light in a spot that gets good direct sunlight so it can charge effectively, and consider how often the area is likely to trigger after dark. In winter, a south-facing position or a lower-activation area is recommended.
✓ Up to 500 Lumens✓ 270° Coverage✓ Motion Activated✓ IP65 Rated✓ 3 Lighting Modes
This compact model is ideal when you want practical security lighting without wiring. For best performance, position it where it receives good direct sunlight and avoid areas with constant night-time triggering.
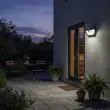
Compact, wide-angle lighting for entrances, paths and access points.
With a cool white output and a wide spread of light, it’s a great fit for lower-traffic areas such as side passages, sheds, bins stores and garden access routes.
Designed for flexibility, this compact solar security light suits a wide range of outdoor locations around your property.
Ideal Locations
Doorways and entrances
Pathways and walkways
Sheds and garages
Garden access points
Best Use Pattern
Motion-activated security lighting
Lower to moderate night-time activation
Useful where wiring is not practical
Great for rental properties
Seasonal Guidance
Spring/Summer: suits most locations
Winter: best in south-facing positions
Winter: prefer lower-activation areas
Keep the panel clear of shade
Versatile placement for garages, stairs, doorways and garden areas.
A practical combination of efficient LEDs, wide beam coverage and motion activation, designed for reliable everyday outdoor security lighting.
Lighting Performance
Up to 500 lumens output
178 × 2835 SMD LEDs
270° wide lighting angle
Cool white light colour
Motion Detection
120° sensing angle
Motion range: 10–16ft
Triggers when movement is detected
Operating Modes
Motion Only mode
Dim (Low) mode
Dim (High) mode
Automatic dusk ON/OFF
Build & Protection
IP65 weatherproof rating
ABS housing
Compact size: 13 × 4 × 9 cm
Lightweight design: 200g
Watch the demonstration to see how the Compact 178 installs and how the light behaves in a typical outdoor setup.
Installation is quick and straightforward, with no wiring or specialist tools required. Most customers complete setup in just a few minutes.
Quick Install Summary
Step 1: Choose a Location
Select a sunny outdoor position
Avoid heavy shade where possible
Step 2: Mount the Light
Fix using screws or adhesive pads
No electrical wiring required
Step 3: Switch On & Test
Turn the light on
Test motion detection after dark
or for a longer guide to get the best charging performance and reliable lighting all year. Correct positioning makes a big difference—especially through autumn and winter, read the following :
Before You Begin
Plan the location, prepare your tools, and install safely.
Location Planning
Face the solar panel south
Avoid shade from trees or buildings
Remember winter sun is lower
Check the mounting surface is solid
North-Facing Tips
Expect reduced winter charging
Use motion-only mode in winter
Angle panel to catch daylight
Keep the panel clean
Tools & Safety
Pencil and spirit level
Suitable screwdriver
Stable platform or ladder
Check for hidden cables
Installation Options
Choose fixings for a permanent mount, or adhesive for a quick setup.
Screw Mount
Mark the mounting points
Pre-drill if needed
Insert wall plugs
Secure bracket firmly
Make It Level
Use a spirit level
Tighten fixings evenly
Check alignment before fitting
Confirm panel faces daylight
Adhesive Mount
Clean the surface well
Ensure it is fully dry
Press firmly into place
Allow adhesive to cure
System Setup & Optimisation
Set the mode and test coverage to match your location and season.
Initial Setup
Remove panel protective film
Select the best mode
Set sensor sensitivity if needed
Test the light at dusk
Position & Aiming
Aim panel for maximum sunlight
Angle light heads as required
Avoid blocked sensor zones
Check for glare on surfaces
Final Checks
Confirm full coverage area
Walk-test the sensor range
Confirm mode behaves correctly
Reposition if charging is poor
Maintenance & Care
Simple upkeep keeps performance strong through every season.
Regular Maintenance
Wipe the panel monthly
Check mounting security
Clear the sensor area
Inspect seals occasionally
Seasonal Adjustments
Summer: choose any mode
Autumn: reduce brightness if needed
Winter: use motion-only mode
Angle panel for low sun
Best Practice
Keep panel free of debris
Avoid installing under eaves
Minimise nearby night lighting
Re-test after storms
Quick Troubleshooting
Try these checks first if the light isn’t performing as expected.
These solar powered lights are designed for easy, reliable outdoor lighting with minimal maintenance. Here’s how they work and what you need to know for best results year-round.
Daytime Charging
Solar panel collects sunlight and charges the internal battery during the day.
For best results, install the panel facing south (in the northern hemisphere), especially in winter when sunlight is limited.
Keep the panel clean and free from shade for maximum efficiency.
Automatic Night Operation
At dusk, the light automatically switches to standby mode.
Built-in motion sensor detects movement and activates the light when needed.
After a set time with no motion, the light returns to standby or turns off to save power.
Selectable Lighting Modes
Most models offer three modes, set by a button on the light or with a remote control:
Mode 1: Motion-activated full brightness, then off — recommended in winter, or if the panel faces north.
Mode 2: Dim light all night, full brightness with motion — works well in spring/autumn with good sunlight exposure.
Mode 3: Constant light (Flood light mode) — best for summer or very high sunlight conditions; may reduce battery runtime in shorter days.
Tip: Adjust mode seasonally for optimal performance and battery life.
Maintenance & Tips
Wipe the panel regularly to remove dust and debris.
Check the light’s position seasonally to ensure good sun exposure.
Test and adjust the motion sensor range if needed.
With correct placement, seasonal mode selection, and occasional cleaning, your lights will provide years of convenient, efficient illumination—no wiring or manual switching required.