Installation Guide: DC Water Pump (6V-9V)
Professional installation instructions for your DC Water Pump with 1.4M maximum head height and up to 340 LPH flow rate. Follow this comprehensive guide to ensure optimal performance, proper setup, and long-term reliability of your water pump system.
✓ 1.4M Max Head
✓ 340 LPH Max Flow
✓ Dry-Run Protection
✓ Multiple Power Options
✓ Easy Installation
Installation Preparation
Proper preparation ensures a smooth installation process and optimal pump performance. Take time to carefully plan your setup before beginning the physical installation.
Site Selection
- Select a suitable location near water source
- Ensure proximity to power source
- Choose a clean, level area free from debris
- Consider accessibility for maintenance
- Protect from direct weather exposure
Required Tools
- Screwdriver set
- Adjustable wrench
- Measuring tape
- Waterproof electrical tape
- Tubing cutter (if applicable)
Materials Check
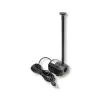
- DC Water Pump (6V-9V)
- Power source (transformer/battery/solar)
- Appropriate tubing
- Connectors and adapters
- Mounting hardware (if needed)
Power Source Connection
This versatile DC Water Pump can be powered through multiple energy sources, providing flexibility for various installation scenarios. Follow the specific instructions for your chosen power method to ensure proper electrical connection and optimal performance.
Transformer Power
- Select appropriate 6V-9V transformer
- Plug transformer into grounded electrical outlet
- Connect pump power cable to transformer
- Secure connection with waterproof protection
- Route power cable safely away from water
Battery Power
- Choose compatible 6V-9V battery pack
- Connect pump's power cable to battery terminals
- Ensure correct polarity (+ and -)
- Place battery in waterproof housing
- Position battery above potential water level
Solar Power
- Position solar panel for maximum sun exposure
- Connect pump's power cable to solar panel
- Use waterproof connectors for outdoor installation
- Consider battery backup for consistent operation
- Secure all connections against weather exposure
Pump Installation Process
Follow these step-by-step instructions to properly install your DC Water Pump and ensure optimal performance. Each stage is critical for establishing a reliable and efficient water pumping system.
Pump Positioning
- Place pump on stable, level surface
- Ensure pump is fully submerged (max. 1m depth)
- Position intake away from debris
- Maintain minimum water level above pump
- Allow sufficient clearance around pump
Water Connection
- Connect appropriate tubing to pump outlet
- Secure connections with clamps if needed
- Ensure tubing is appropriate diameter (8–8.5 mm outlet)
- Minimize bends in tubing for optimal flow
- Route tubing to desired discharge point
Flow Adjustment
- Adjust flow rate using inline regulator (if fitted)
- Start with lowest flow setting if adjustable
- Gradually increase to desired output
- Monitor system for optimal performance
- Adjust as needed for specific application
System Startup Procedure
Proper startup ensures your DC Water Pump begins operation correctly and helps identify any potential issues before they become problems. Follow these procedures based on your power source type.
Transformer Startup
- Verify all connections are secure
- Ensure pump is properly positioned
- Turn on power to electrical outlet
- Observe initial pump operation
- Check for proper water flow
Battery Startup
- Confirm battery is fully charged
- Check all connection points
- Turn on power switch on battery pack
- Monitor initial operation
- Verify expected runtime performance
Solar Startup
- Ensure solar panel receives direct sunlight
- Verify all connections
- Allow system to power up naturally
- Check operation during peak sunlight
- Test performance under various light conditions
Performance Verification
After installation and initial startup, it's important to verify that your DC Water Pump is operating correctly. This systematic check ensures optimal performance and helps identify any adjustments needed.
Flow Verification
- Confirm water is flowing at expected rate
- Verify flow reaches desired destination
- Check for consistent operation
- Measure actual flow rate if needed
- Adjust flow control to optimize performance
System Inspection
- Check for leaks at all connection points
- Listen for unusual noises during operation
- Verify power source is providing adequate voltage
- Ensure pump isn't straining or overheating
- Confirm water levels remain appropriate
Performance Testing
- Test pump at different voltage inputs (6V–9V)
- Verify maximum head height capability (up to 1.4M at 9V)
- Confirm flow rate meets specifications (up to 340 LPH at 9V)
- Test operation for extended period
- Document baseline performance for future reference
Maintenance Requirements
Regular maintenance is essential for ensuring the longevity and reliable operation of your DC Water Pump. Follow these maintenance guidelines to keep your system running smoothly and prevent potential issues.
Regular Inspection
- Check connections weekly
- Inspect power cables for damage
- Monitor for unusual noise or vibration
- Verify consistent flow performance
- Observe power source condition
Cleaning Procedures
- Clean pump intake filter monthly
- Remove and clean impeller quarterly
- Clear debris from water source
- If using, wipe solar panels weekly
- Clean battery terminals periodically
Seasonal Maintenance
- Perform thorough cleaning twice yearly
- Check all seals and gaskets
- Inspect tubing for wear or damage
- Test electrical components
- Protect system during freezing conditions
Troubleshooting Guide
If you encounter issues with your DC Water Pump, use this troubleshooting guide to identify and resolve common problems quickly and effectively.
Pump Not Running
- Check power source connection
- Verify power source is functioning (6V–9V output)
- Inspect for blocked impeller
- Check for tripped circuit protection
- Verify voltage is within rated range
Reduced Water Flow
- Clean intake filter
- Check for kinked or blocked tubing
- Verify sufficient water level
- Inspect impeller for damage
- Check flow adjustment setting
Unusual Noise
- Check for air in pump housing
- Inspect impeller for debris
- Verify pump is fully submerged (max 1.0m)
- Check for loose mounting
- Inspect for worn bearings
Technical Specifications
Understanding the technical capabilities of your DC Water Pump helps ensure proper application and expectations for performance. Reference these specifications when planning your installation and troubleshooting any issues.
Performance Specs
- Maximum Head: 1.4 meters (at 9V)
- Maximum Flow Rate: 340 LPH (at 9V)
- Operating Voltage: 6V–9V DC
- Power Consumption: 1.2–2.8W
- Dry-run protection: Yes
Physical Specs
- Compact design for versatile placement
- Durable, corrosion-resistant plastic body
- Water-resistant components
- 8.5mm standard outlet
- Submersible depth: up to 1.0m
Application Range
- Small to medium water features
- Pond & garden fountains
- Hydroponics/DIY irrigation
- Aquarium and fish tanks
- Tabletop and indoor fountains
Important Safety Guidelines
Always prioritize safety when installing and operating your DC Water Pump. These guidelines help prevent accidents, damage to equipment, and ensure compliance with standard safety practices.
- Always disconnect power before handling — Never work on the pump while connected to power
- Keep electrical connections dry — Use waterproof connectors and position connections above water level
- Follow electrical codes — Comply with all local electrical regulations and standards
- Use proper power sources — Only connect to appropriate 6V–9V power supplies
- Protect from weather — Shield non-waterproof components from direct exposure
- Prevent tripping hazards — Secure and hide cables to avoid accidents
- Use GFCI protection — When using mains power, always use ground fault protection
- Avoid running dry — Pump is protected, but always ensure it remains properly submerged during operation
- Keep out of reach of children — Install in secure location away from unsupervised access
- Follow manufacturer guidelines — Always adhere to specific instructions provided with your pump
Creative Application Ideas
This versatile DC Water Pump can be used in numerous creative ways. Consider these application ideas to maximize the value and enjoyment of your pump system.
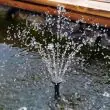
Water Features
- Desktop fountains
- Small cascading water features
- Zen gardens with flowing water
- Tabletop waterfall displays
- Indoor water walls
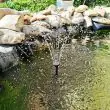
Garden Applications
- Small pond circulation
- Solar-powered garden features
- Drip irrigation systems
- Plant watering automation
- Bird bath fountains
Specialized Uses
- Hydroponics systems
- Small aquaponics setups
- DIY cooling systems
- Science project demonstrations
- Portable water transfer
Professional Installation Tips
Enhance the performance and longevity of your DC Water Pump with these professional installation recommendations and best practices.
- Use silicon sealant — Apply to non-submerged connections for extra water protection
- Install an inline filter — Protects pump from debris and extends operational life
- Create a dedicated power circuit — Ensures consistent power delivery
- Label all connections — Makes future maintenance and troubleshooting easier
- Install a check valve — Prevents backflow when pump is not operating
- Use flexible tubing — Reduces stress on connections and dampens vibration
- Create service loops — Extra cable/tubing length allows for easier maintenance
- Document your setup — Take photos and notes for future reference
- Consider a timer — Automates operation and conserves power
- Install a quick-disconnect — Enables easy removal for maintenance
Installation Success
By following this comprehensive installation guide, you've ensured your DC Water Pump (6V-9V) will operate efficiently and reliably. With proper installation and regular maintenance, this versatile pump will provide excellent service for your water feature, garden project, or specialized application. Remember that the maximum 1.4M head height and up to 340 LPH flow rate make this pump ideal for small to medium applications where precision and reliability are essential. For any additional questions or support needs, our customer service team is always available to provide expert guidance and assistance.